Moss Lawns Replacing Grass: Rise of No-Mow Yards
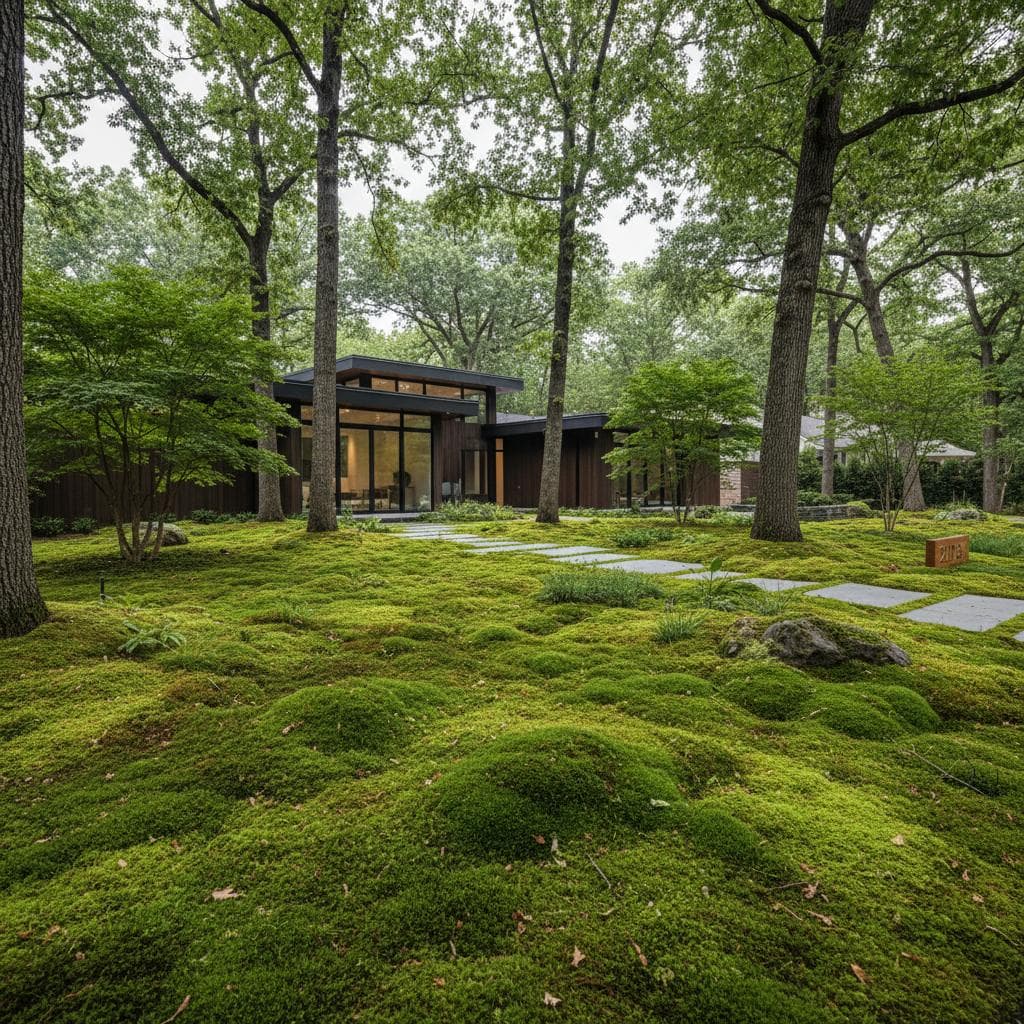
Homeowners often feel frustrated with traditional lawns that require constant mowing, watering, fertilizing, and reseeding. Brown patches appear despite weekend efforts with the mower. Moss offers a living carpet that stays green without these demands. It succeeds in conditions where grass struggles, such as shade, compacted soil, and inconsistent moisture.
Conventional grass depends on regular inputs to remain healthy. Moss draws moisture from the air and rain through surface filaments rather than roots. This difference makes moss a practical option for low-maintenance yards once established properly.
The Honest Truth About Moss Lawns
Moss differs from grass in growth habits and care needs. It never requires mowing or fertilizing, yet it can dry out under full sun or heavy use. Homeowners who expect instant results often face setbacks because moss spreads slowly and needs time to anchor.
What You Need Before Starting
Assess your yard against key conditions before any work begins. Moss performs best in partial to full shade with damp, acidic soil. Light foot traffic is acceptable, but busy paths need stepping stones or gravel routes.
Ideal Conditions
- Shade levels that limit direct sun exposure
- Consistent moisture from humidity or rainfall
- Compacted soil with pH between 5.0 and 5.5
- Limited heavy use areas
Gather basic tools including a garden rake, soil pH test kit, spray bottle, and moss starter material. Sulfur or peat moss can adjust pH if needed.
Preparing Your Yard for Moss Installation
Thorough site preparation prevents patchy results. Remove all grass and weeds to create a bare surface. Use a sod cutter for larger areas, then rake until the soil feels firm.
Test soil pH and apply amendments to reach the target range. Mist the surface lightly before laying moss sheets or spreading a slurry of fragments. Press material firmly into contact with the soil. Mist daily for the first few weeks, then reduce frequency as attachment occurs.
Troubleshooting Common Problems
Brown patches usually signal excessive dryness or sun exposure. Increase misting and add temporary shade until recovery begins. Loose areas that fail to fill in need better pressing and additional fragments.
Slimy growth from algae or mold requires reduced watering and improved airflow. Redirect foot traffic with paths when compression damages sections.
When to Call a Professional
Small shaded patches suit do-it-yourself efforts. Larger conversions on slopes or uneven ground benefit from expert analysis of drainage and soil. Specialists can recommend species suited to local climate patterns and create hybrid designs with other low-water plants.
The Environmental and Practical Payoff
Moss eliminates most water, fertilizer, and equipment needs associated with grass. It filters rainwater, reduces erosion, and improves air quality without chemicals. Long-term costs drop because maintenance equipment and supplies are no longer required.
Integrating Moss into Existing Landscapes
Start with targeted placements to test performance. Moss borders stone paths, fills spaces under trees, adds texture to rock gardens, and stabilizes soil near water features. These small additions reveal how moss behaves in your specific conditions.
Long-Term Care and Maintenance
Remove fallen leaves with a soft broom to maintain light and air access. Mist during extended dry periods. Pull weeds by hand before they spread. Avoid all fertilizers, which favor competing plants. Add fresh fragments to thin spots and keep them moist until established.
Cost and Time Reality Check
Initial material costs often exceed those for grass seed. Savings appear over time through reduced labor, water use, and equipment purchases. Installation spans one or two weekends for typical yards. Full coverage develops over several months, rewarding patience with decades of low-effort greenery.
Practical Lessons from Successful Installations
Match site conditions closely before purchase. Prepare soil thoroughly rather than rushing application. Maintain steady moisture during establishment without overwatering. Redirect traffic early to protect new growth. These steps consistently produce dense, resilient results.